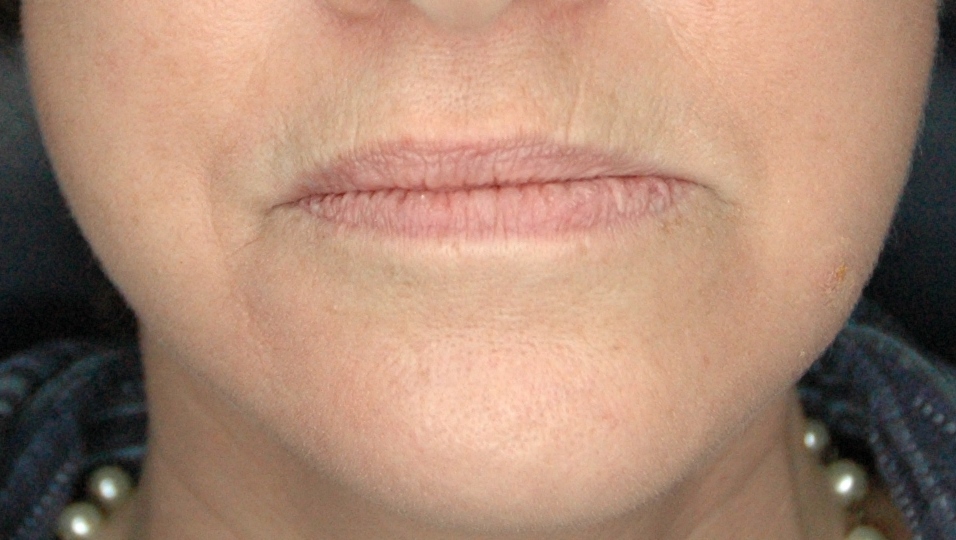
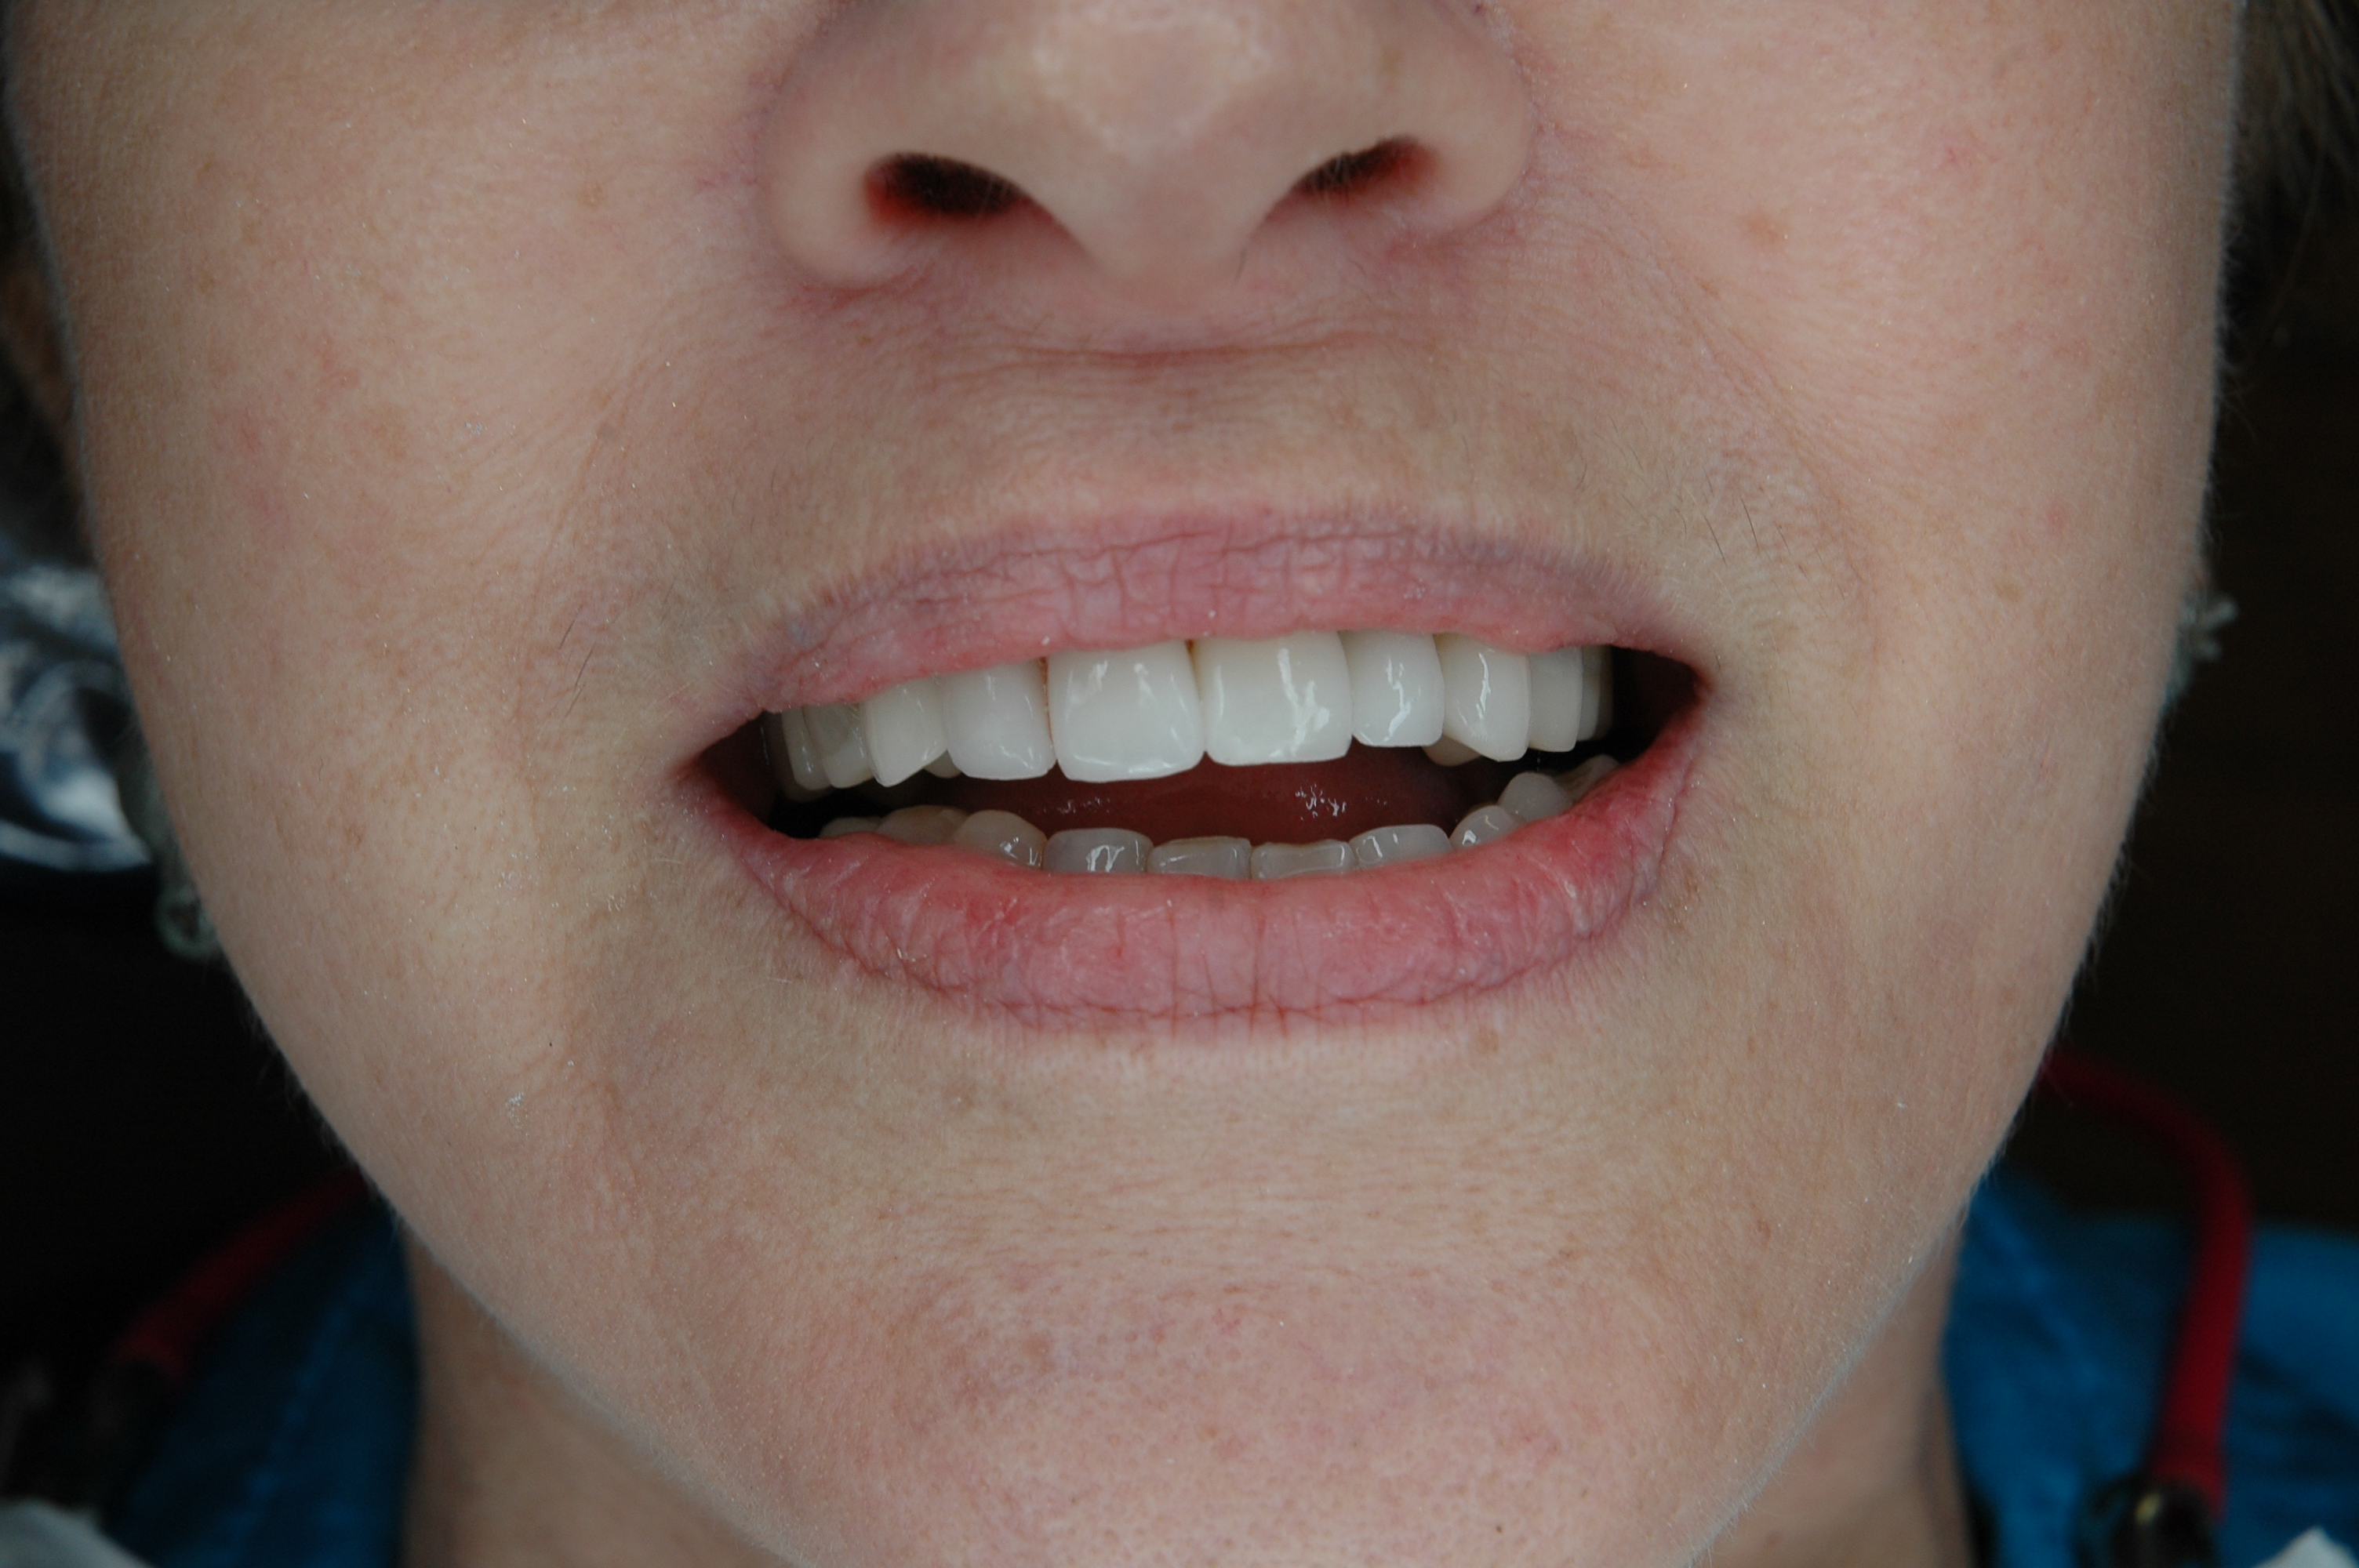
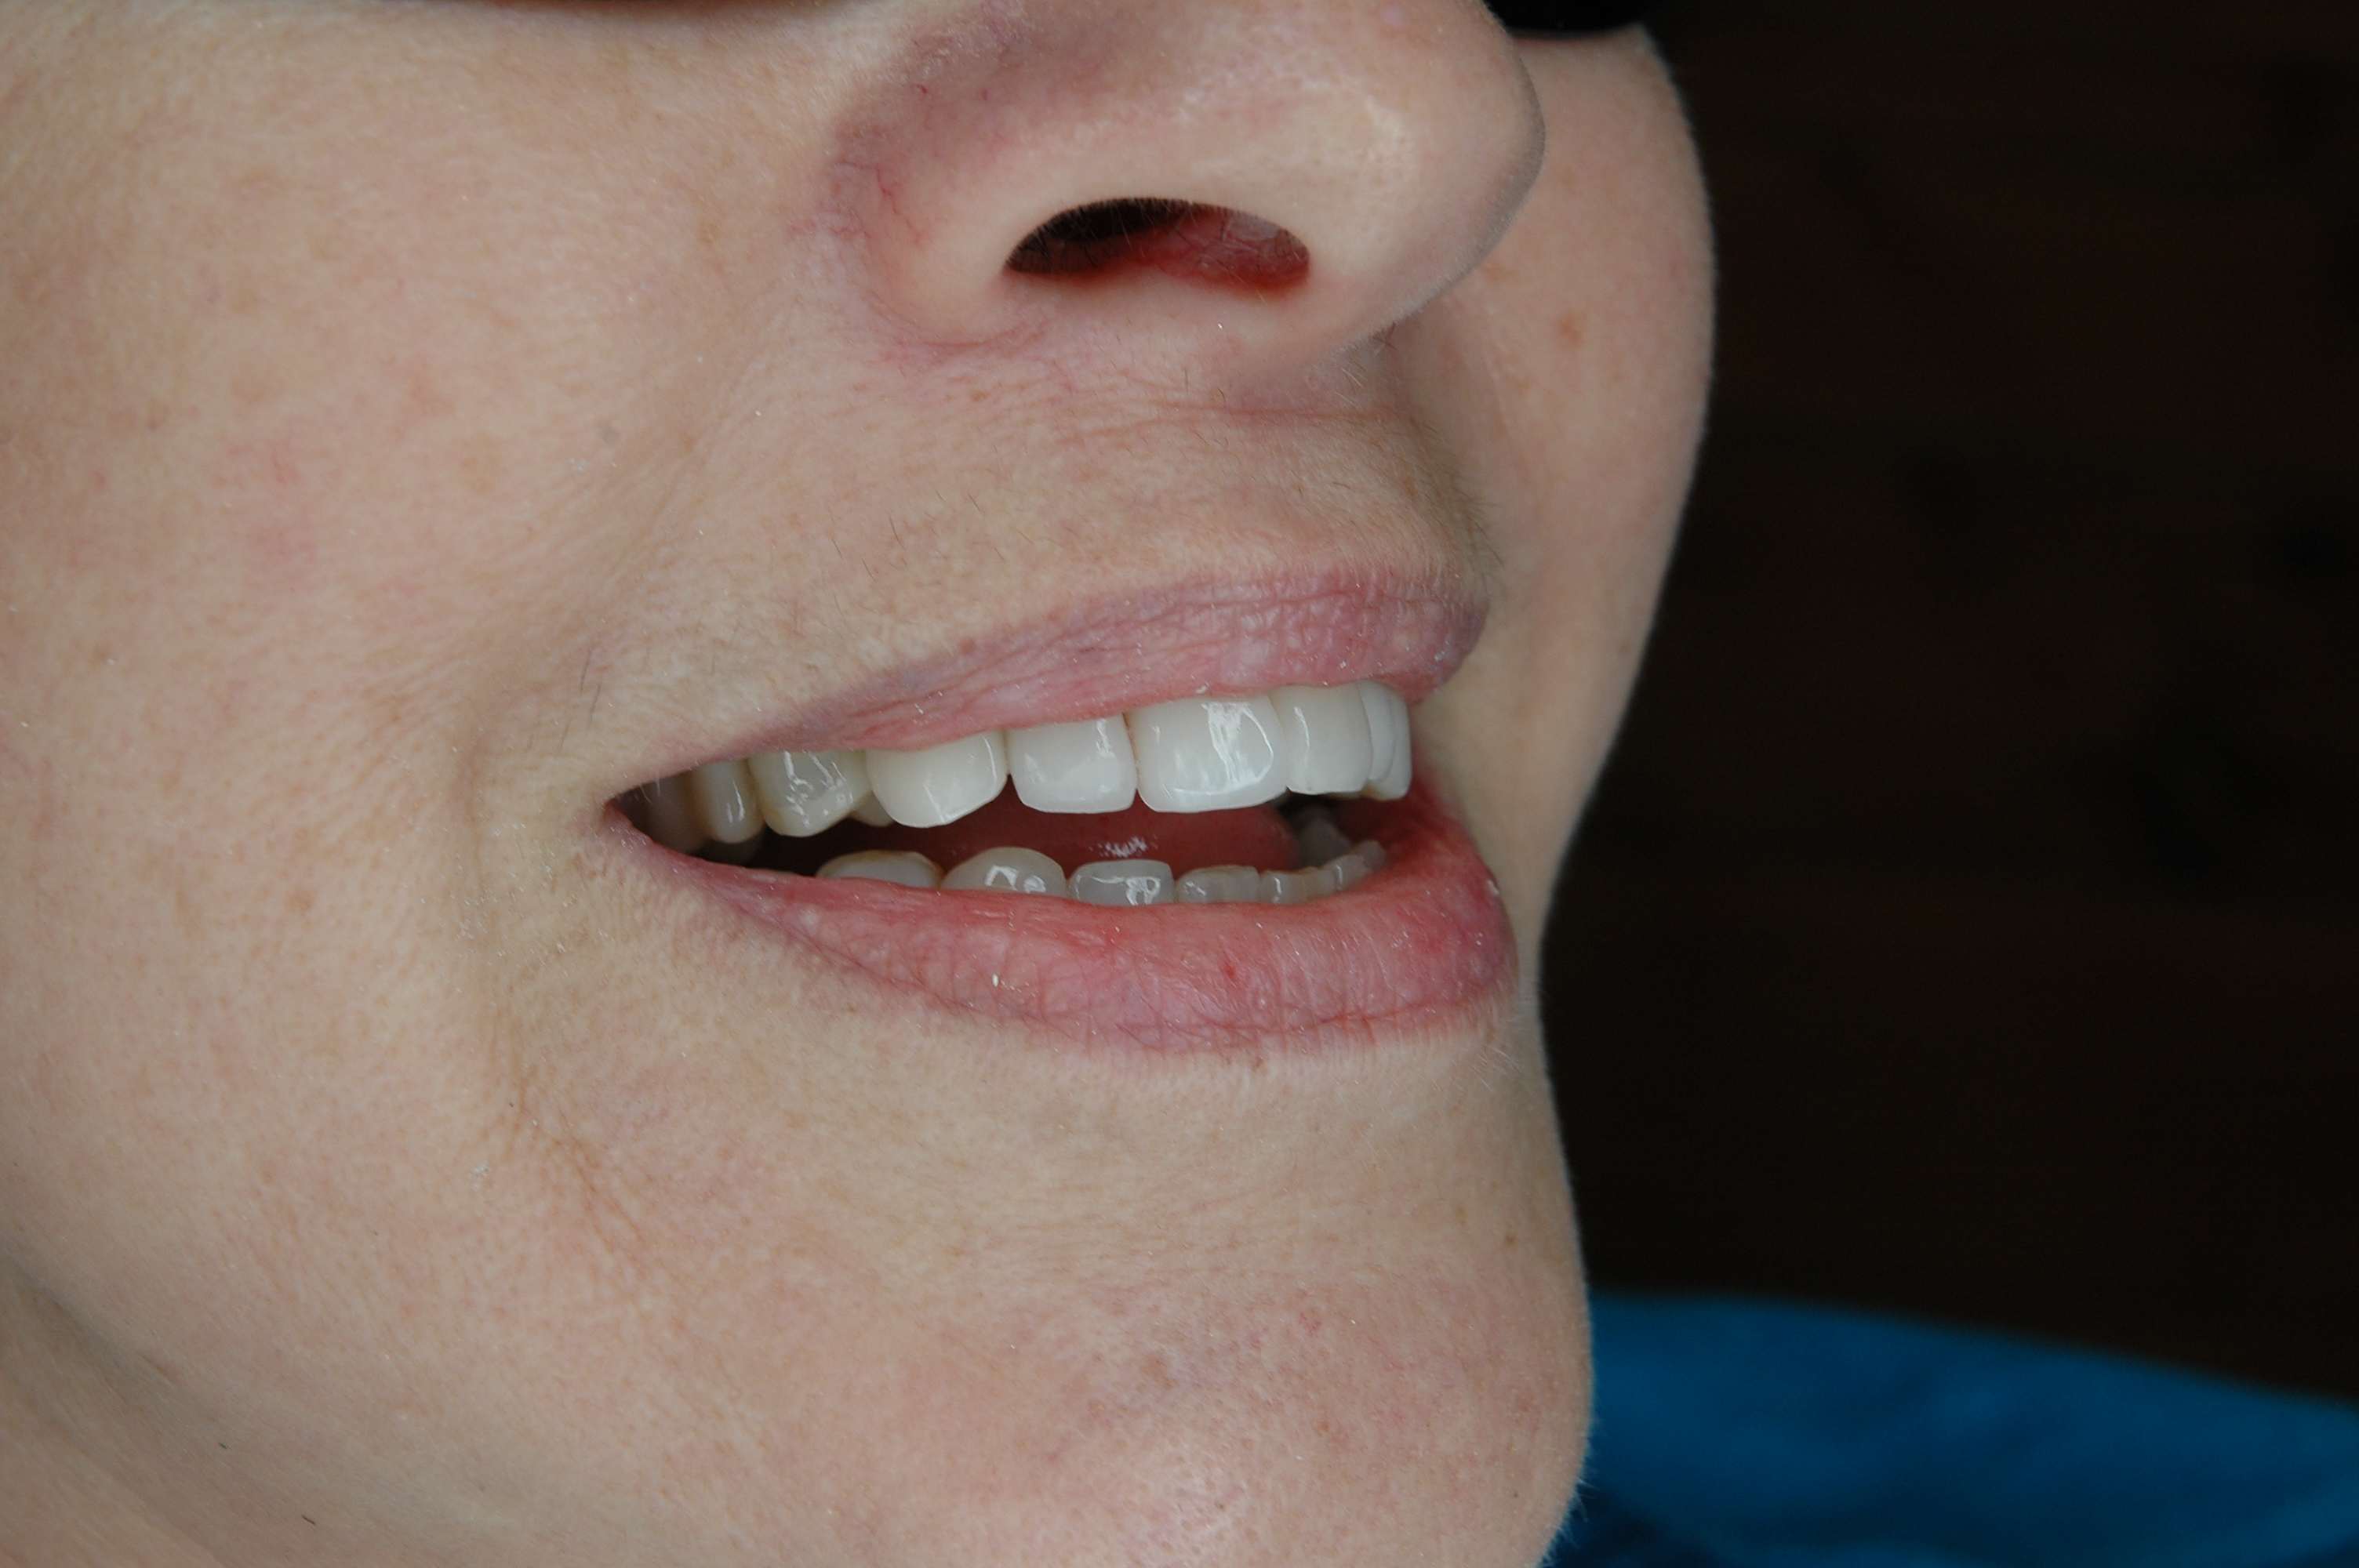
The reason Mrs K came to see us was that her young grand daughter had asked her why she always looked so sad. You see she had been sad for a while as she had been windowed a couple of years prior but she feels that she had already come to terms with her loss. Mrs K realized that her teeth or her bite was the reason that she was looking, well, down in the mouth.

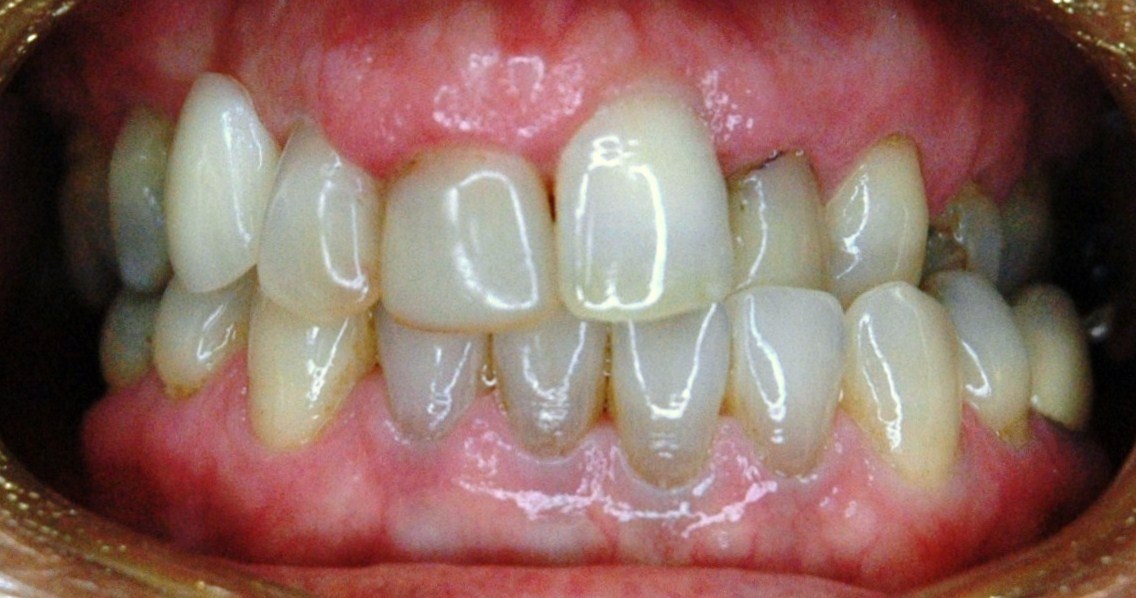
Mrs K presented with missing 14,13, 24,26, 36, 46 and 47. She had a single tooth acrylic denture for her missing 13 only and is a skeletal class 3 with a severe cross bite on her left side. Her bite was collapsing. Most of her teeth were heavily restored with existing root canal therapy on the 11 and 22. She was in her late 60’s and was not interested in orthodontics and having had a single tooth partial denture for the missing 13, she did not want any more dentures.
Stage 1
– Establishing gingival symmetry and placing implant in a single appointment.
Using just soft tissue reduction we violated biological width – We needed to crown lengthened later. We attempted this first to see if the result would suffice.
Note the surgical site was not immediately bleeding.

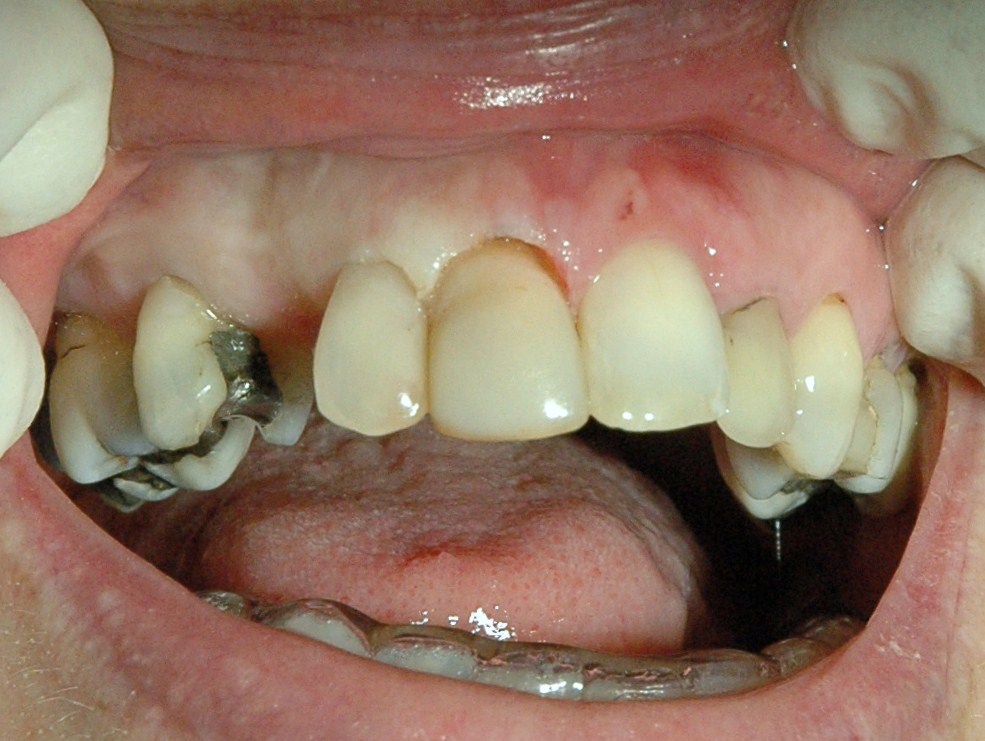
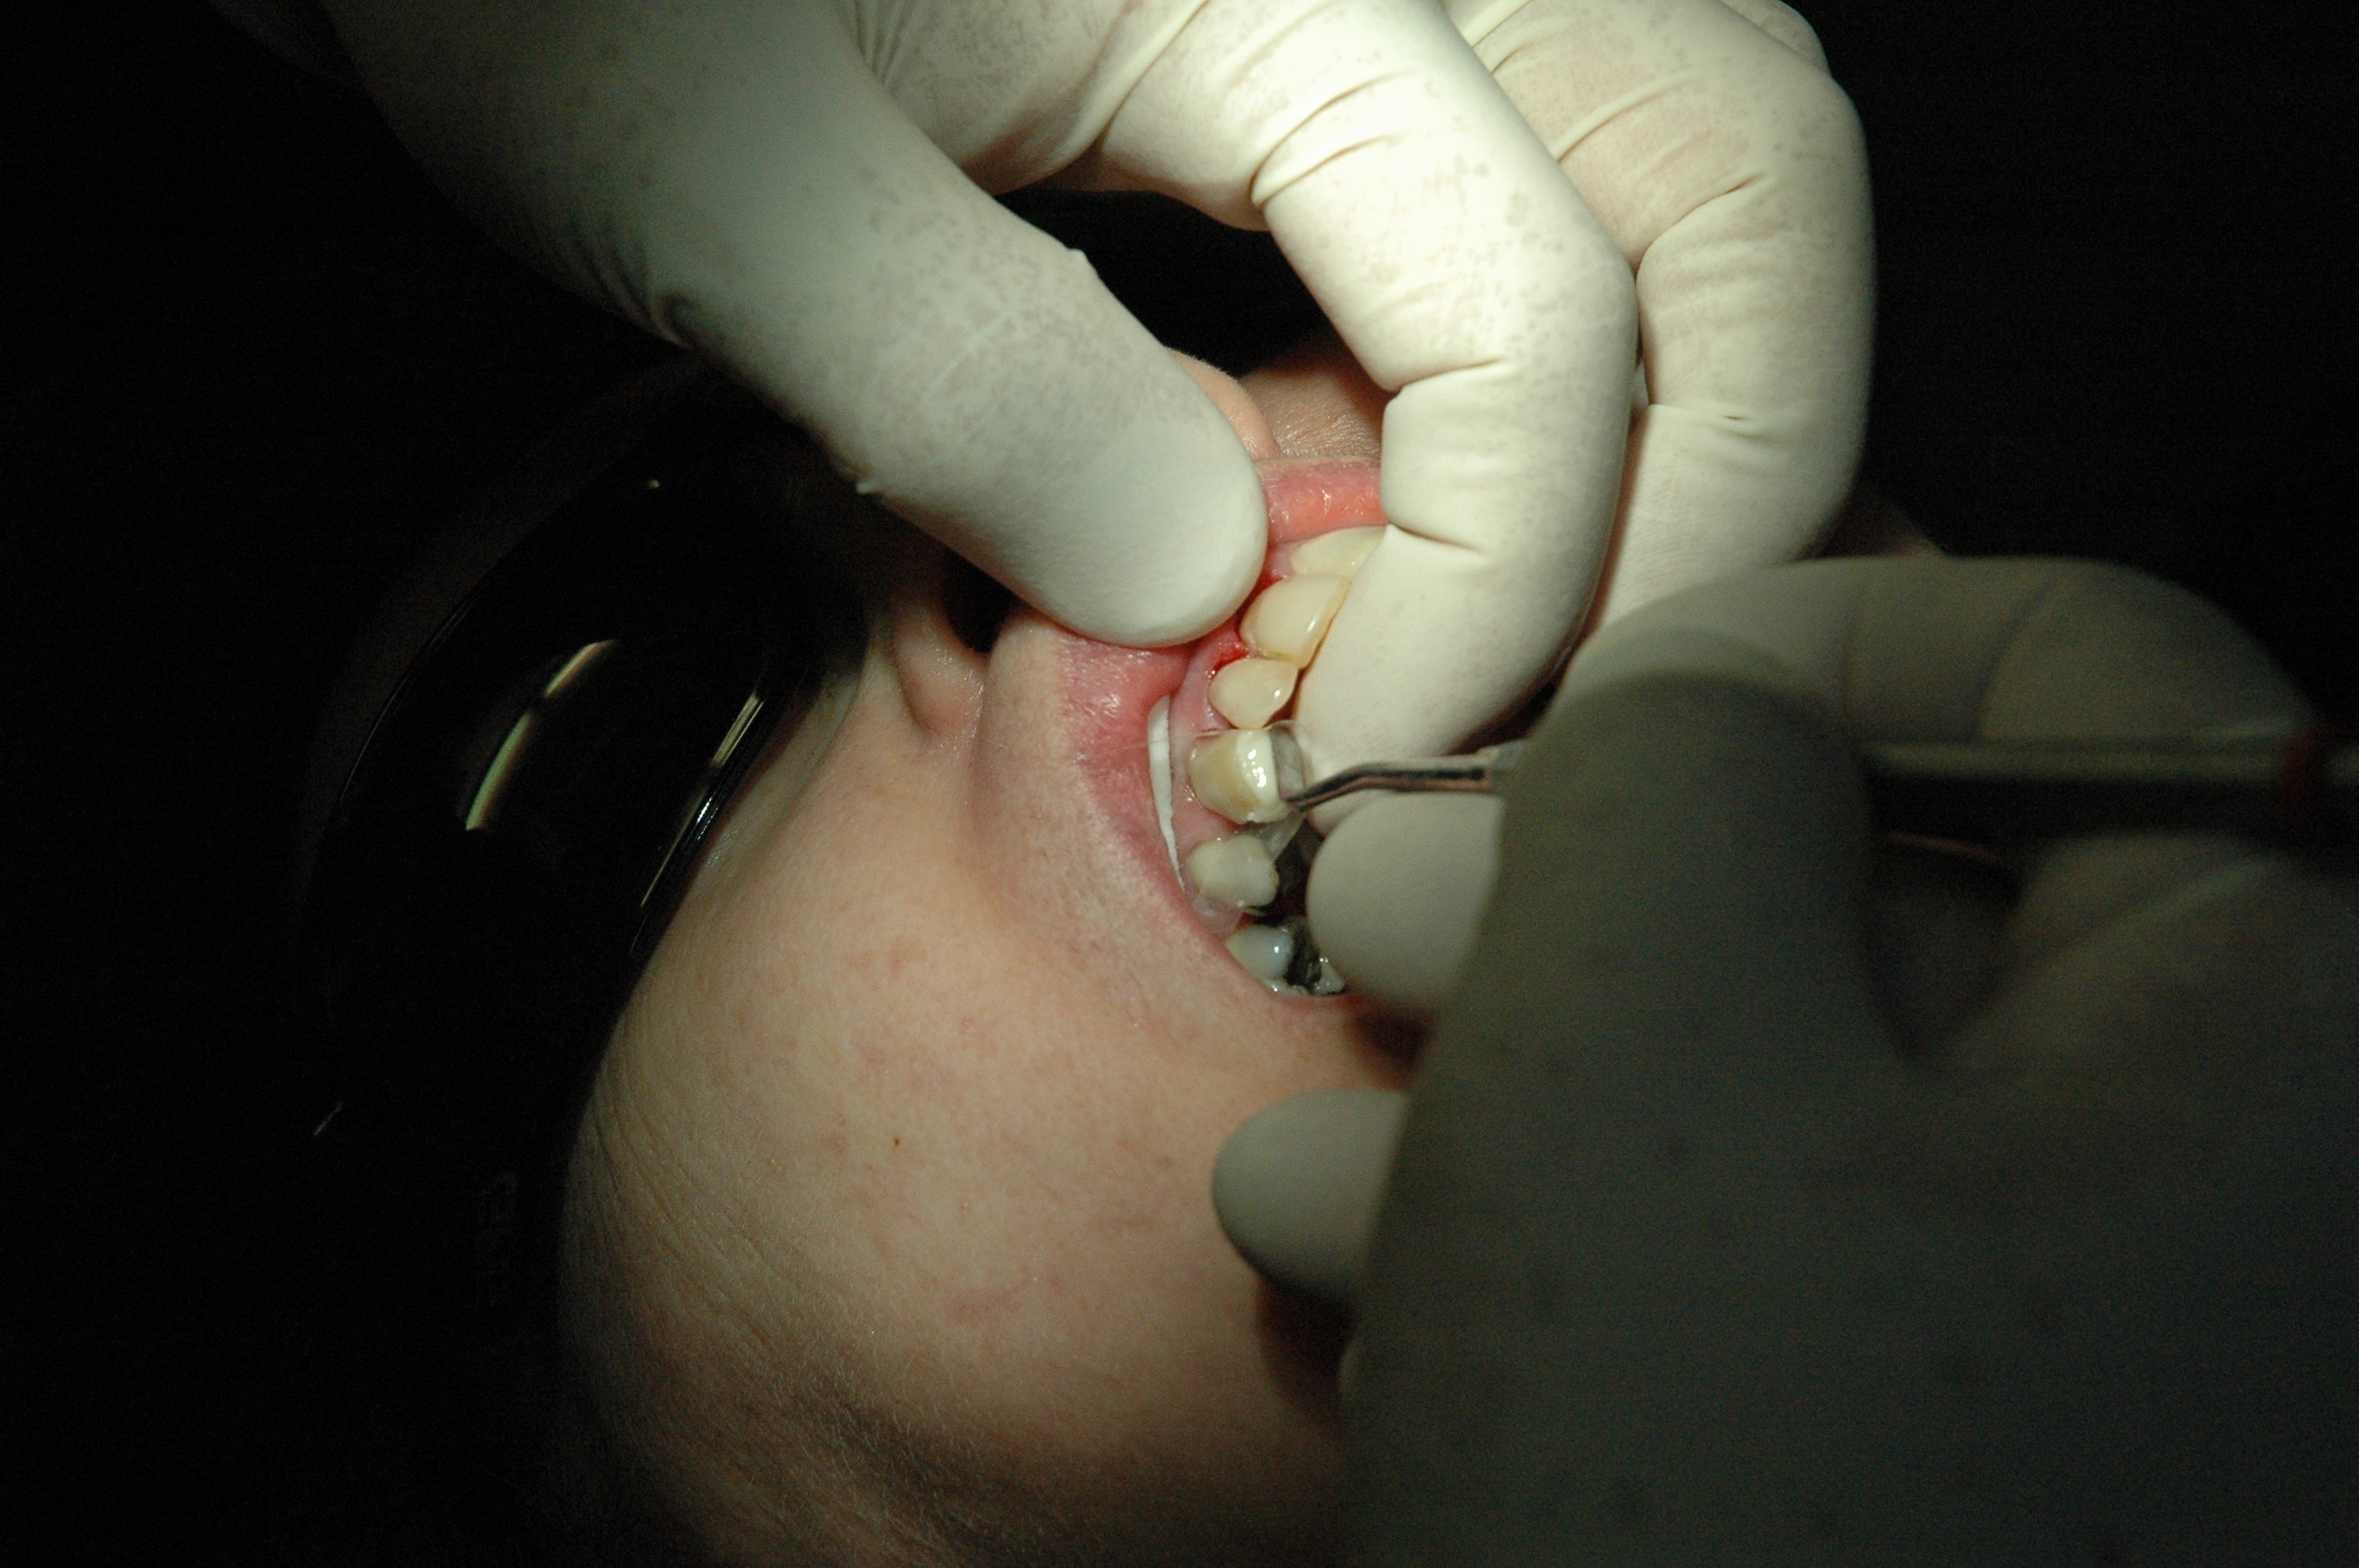
Implant site established … again with waterlase. Note the crown lengthened sites 12,11 are now bleeding. I also did some minor gingivoplasty on the the 22 which does not show up here.
Waterlase sites are good in that there are relatively blood free when you are working on them but do eventually bleed which I guess is good for the healing. The laser sites heal very well. In fact in this case the 11 site healed too well – (see photos later)

Placement of implant fixture.
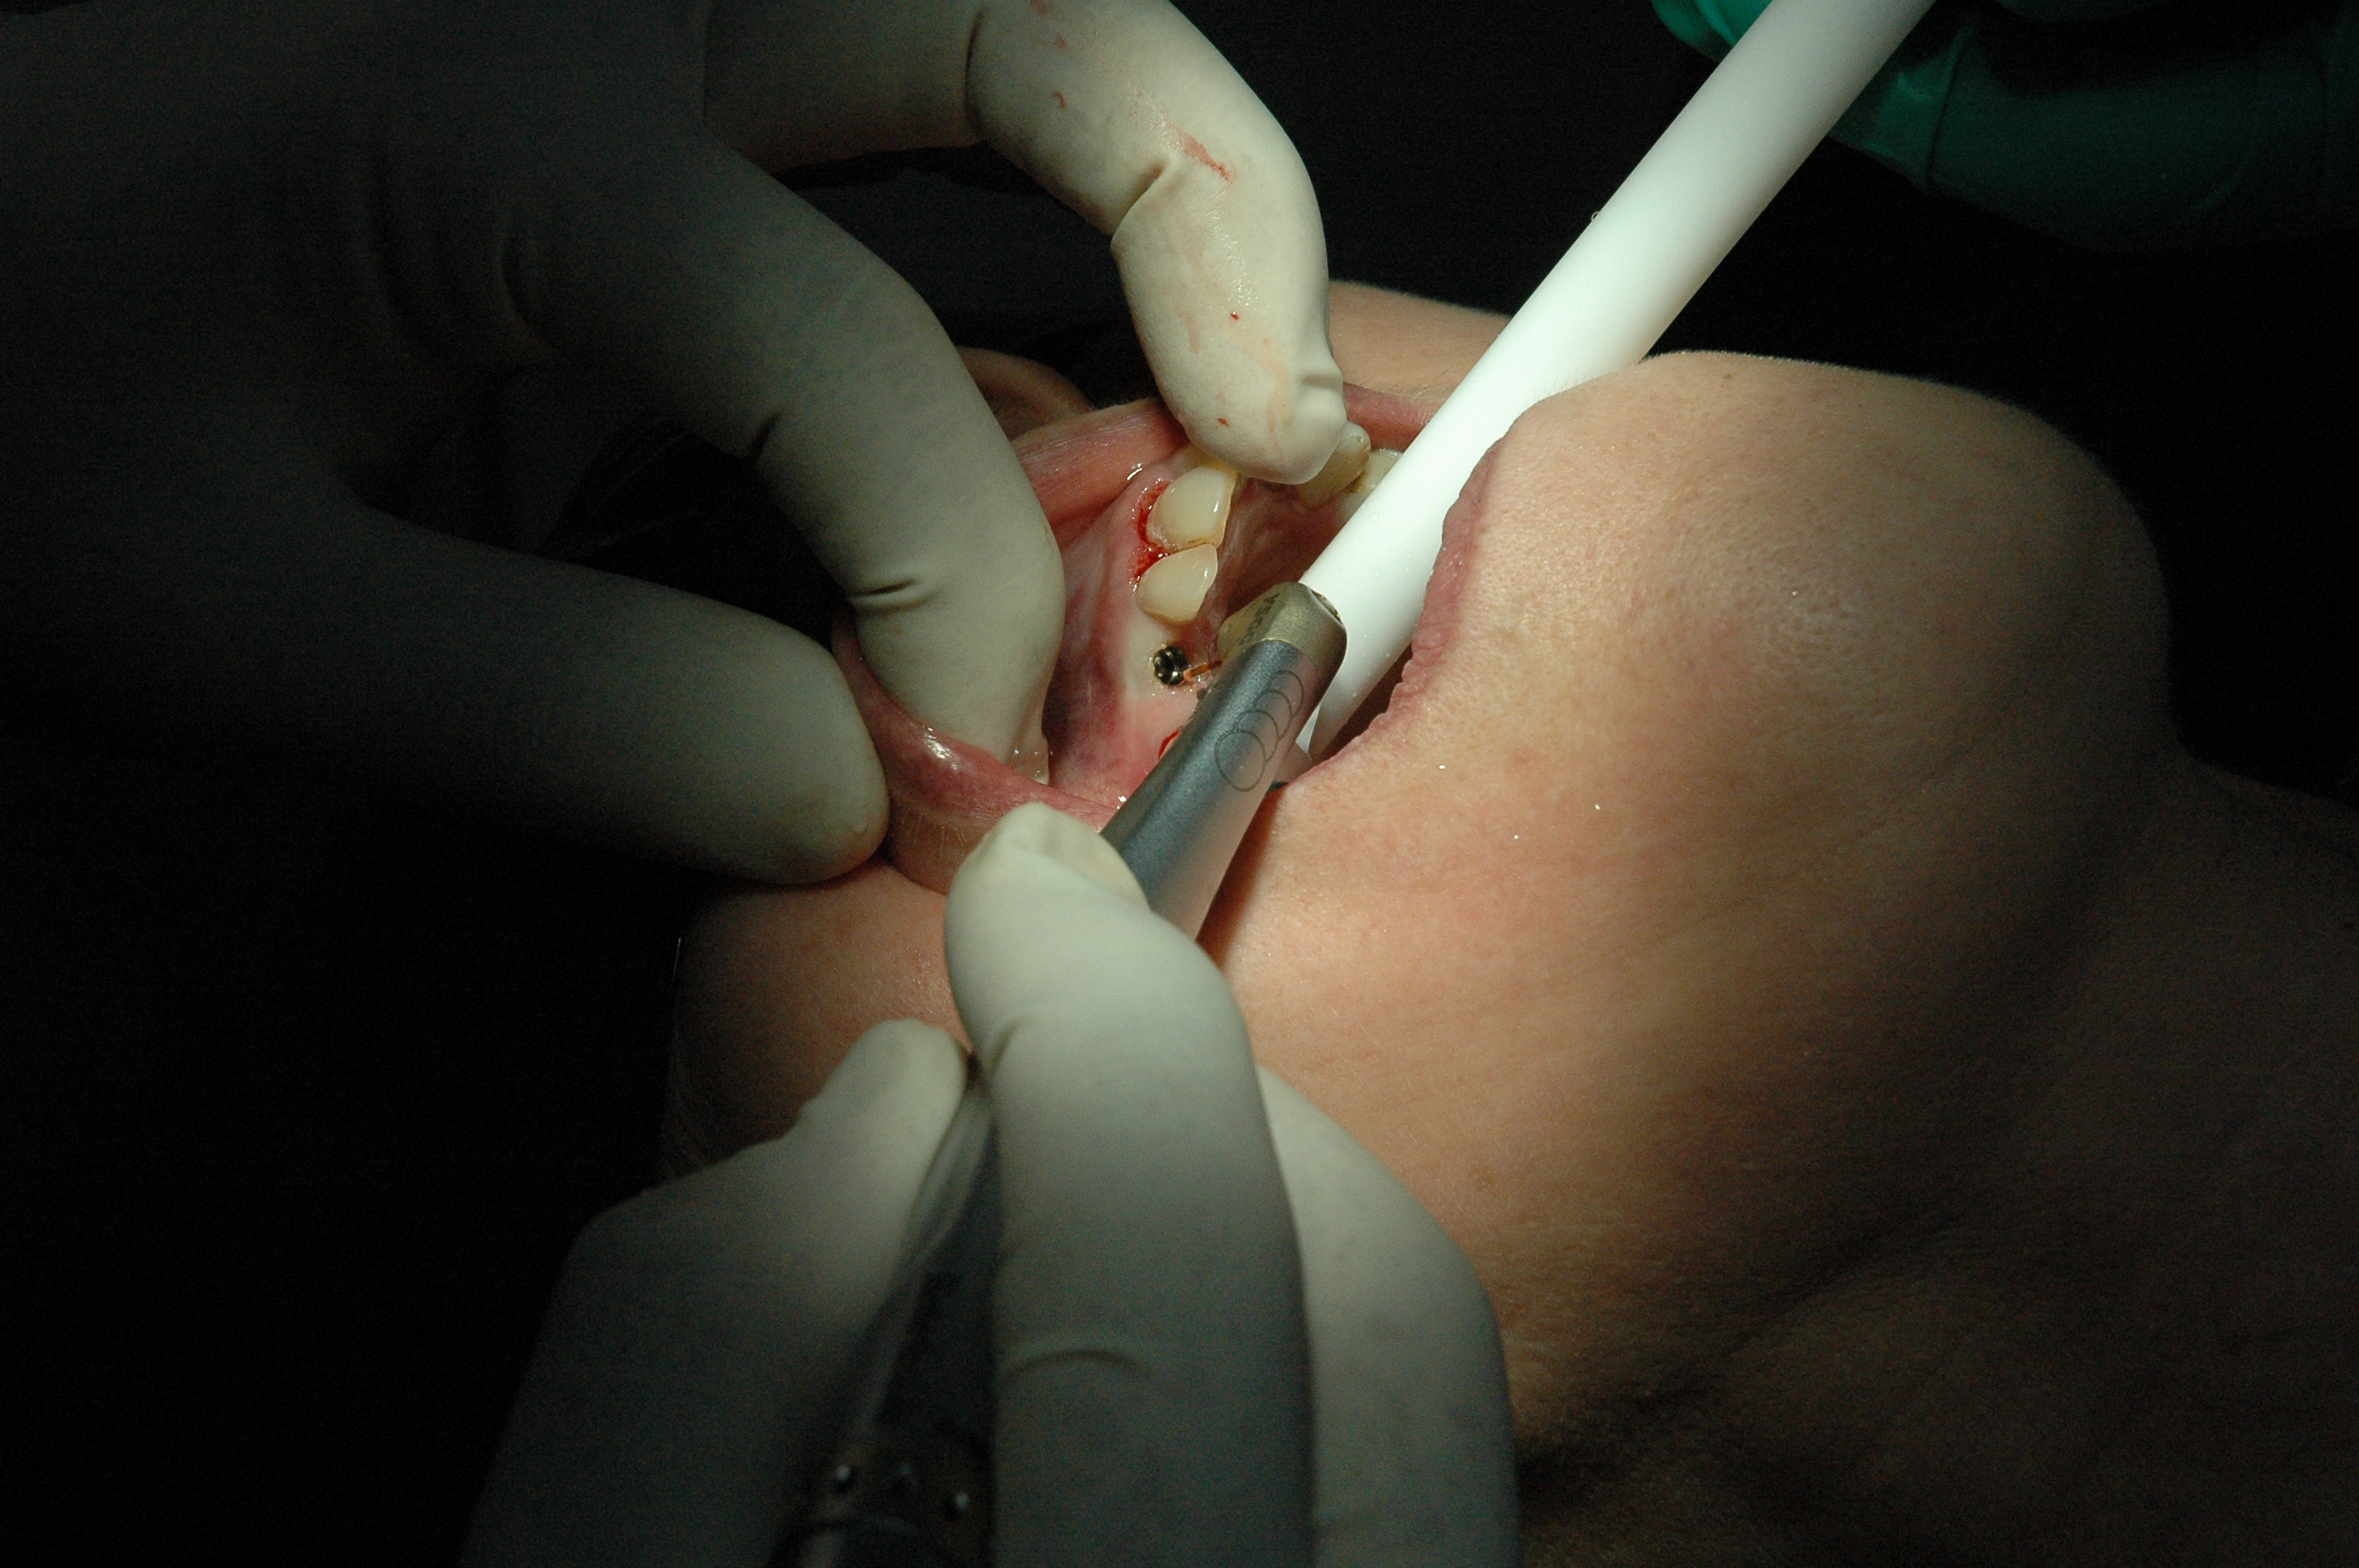
Establish contour or margin for abutment

Abutment in place and fine tuning of gingival contour
Temporary composite crown builded up free hand to support and establish gingival contour for final restoration.
Of course this tooth is not to be loaded until osseointegration has established.
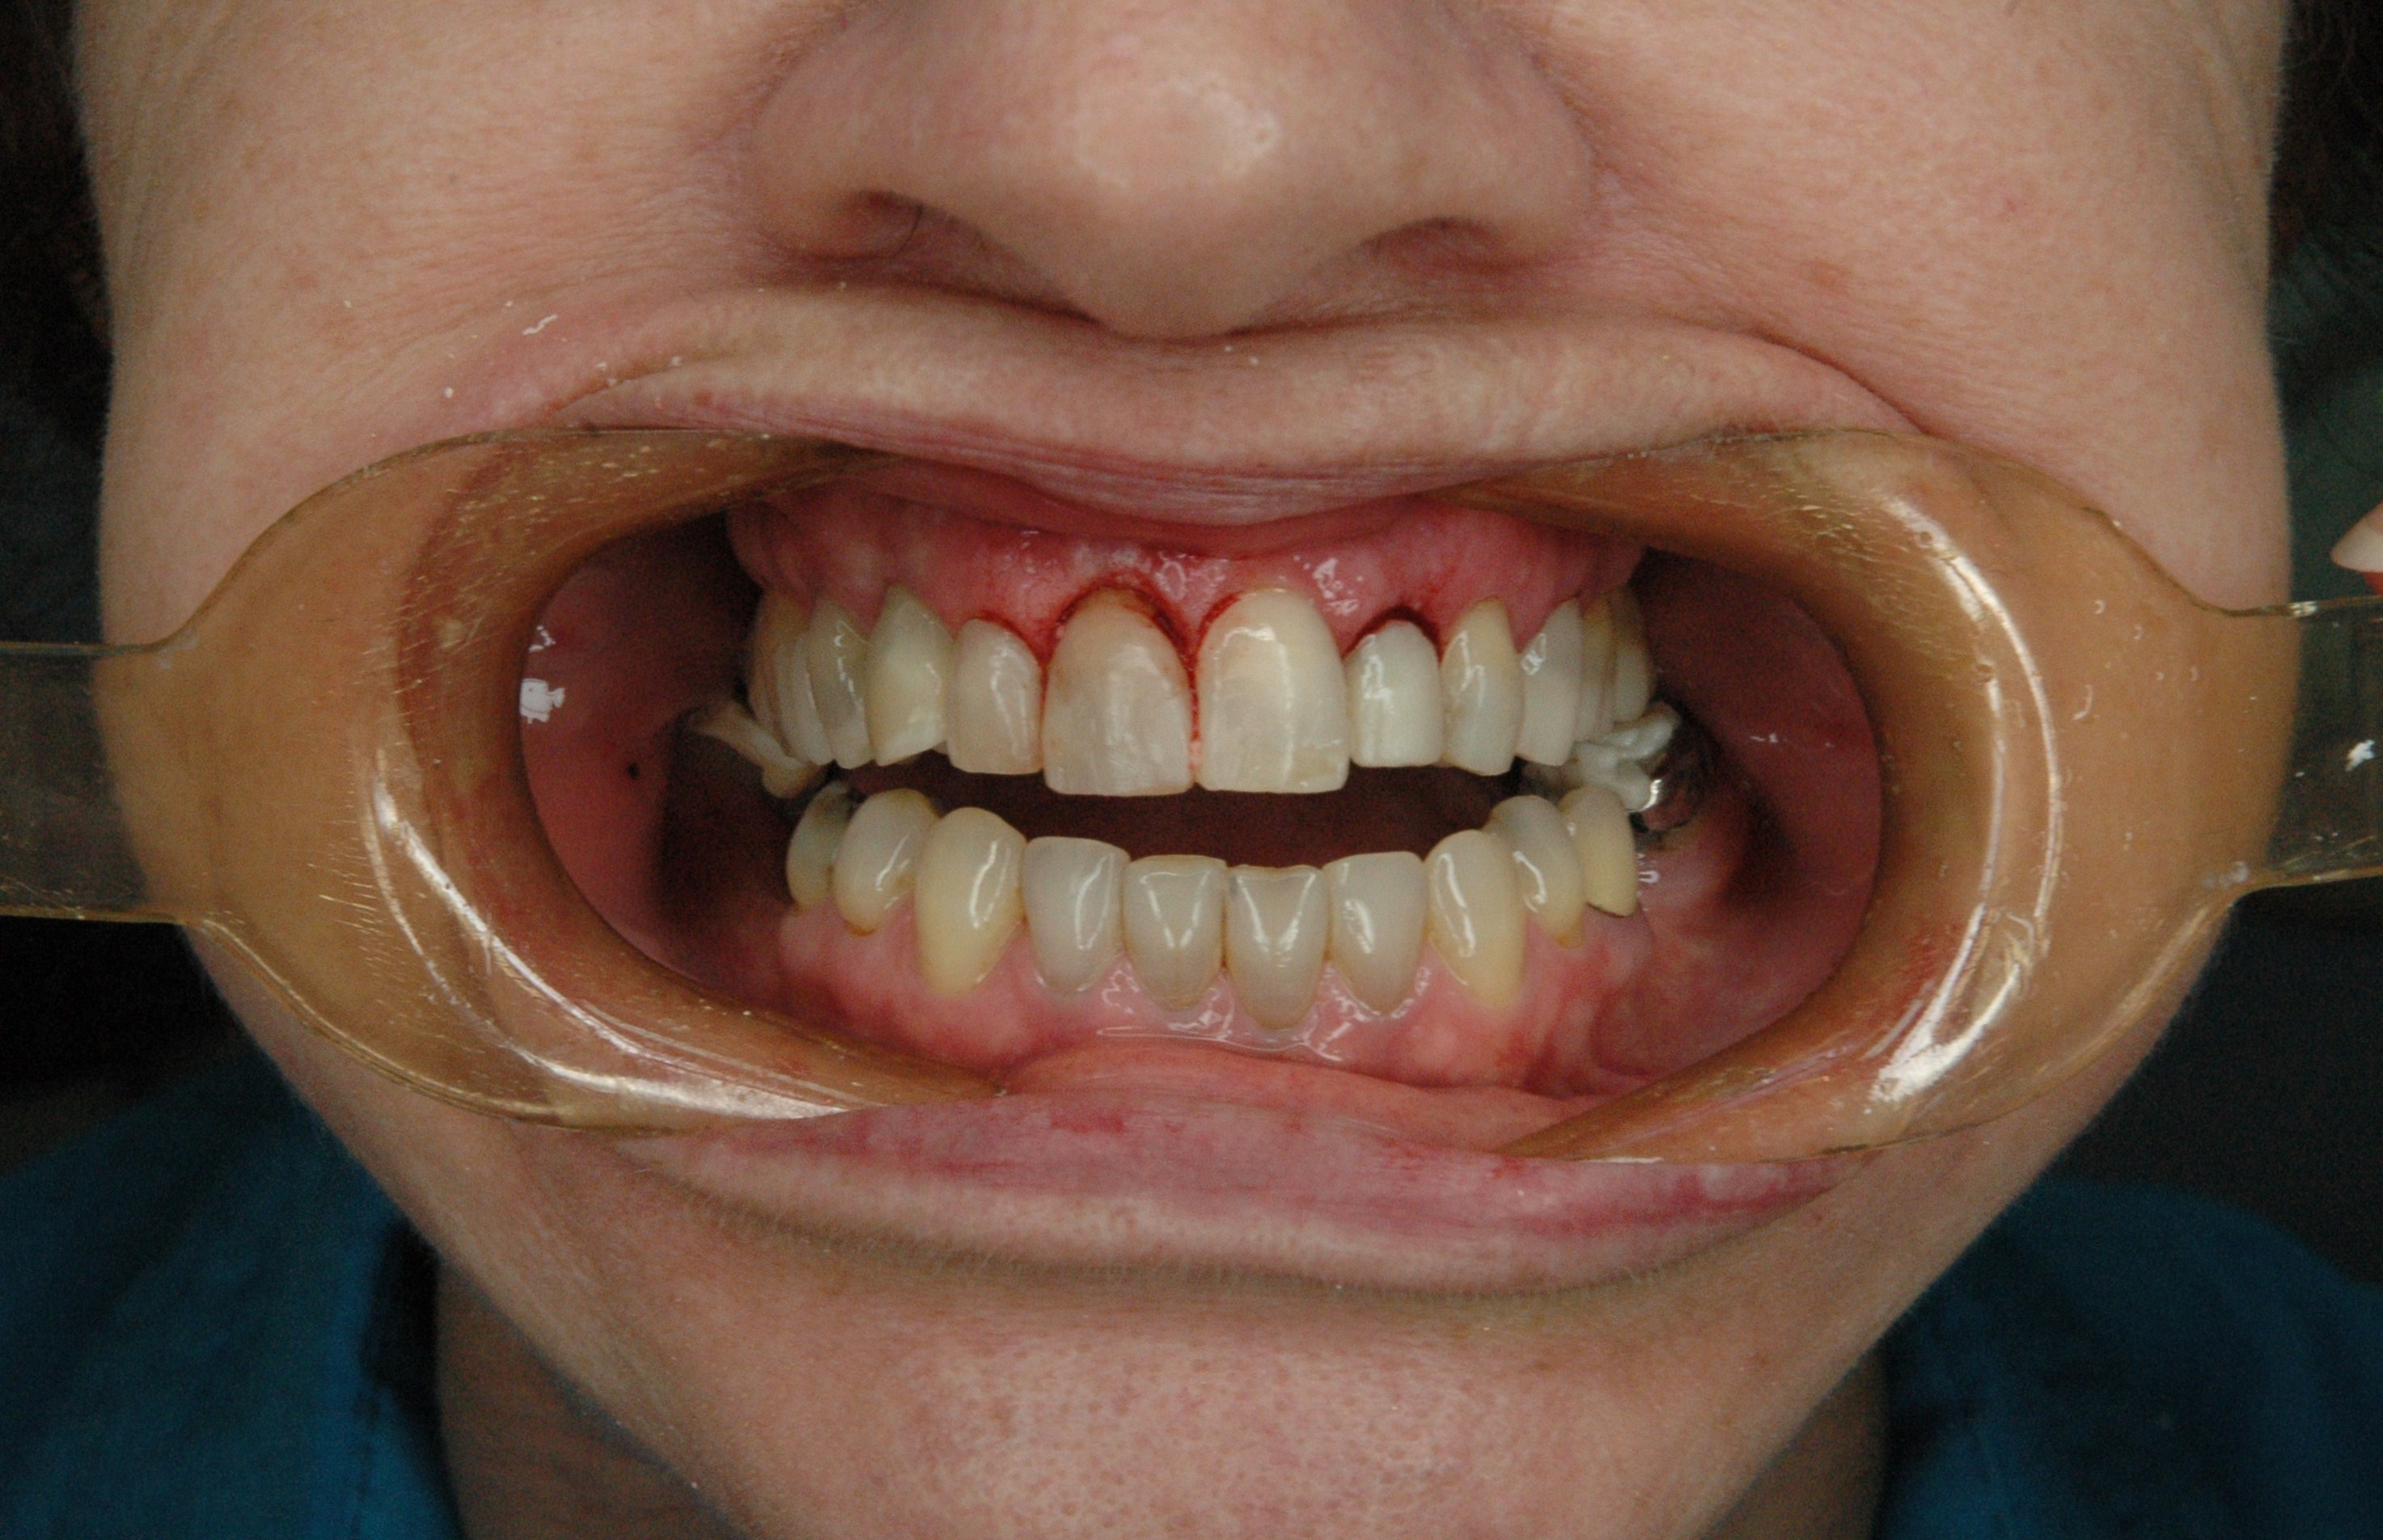
One month after we started work …..
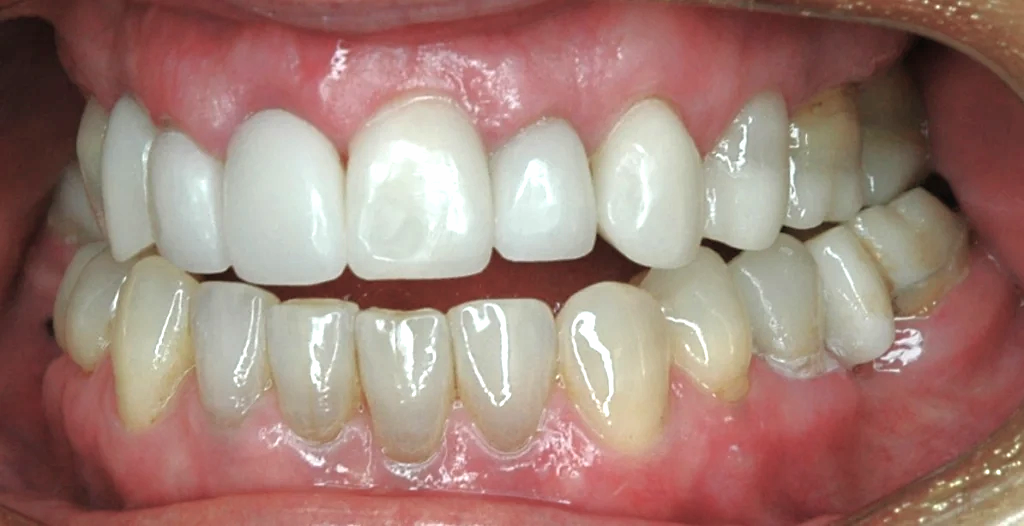
At one month post operative. In the mean time all posterior restorations that needed to be restored had been. The occlusion is reestablished on the left side. The right side was restored with two implants. At this stage the occlusion is supported by the splint.
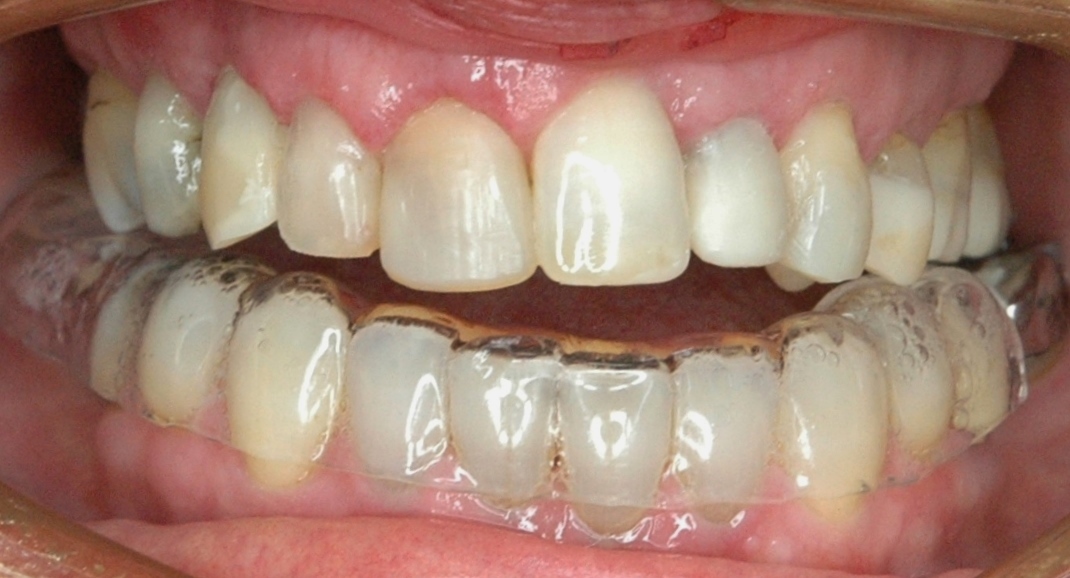
Anterior open bite was always going to be the compromise. Without orthodontics this was a practical solution which allowed me to place an implant to replace the 13 partial denture as well as address the severe cross bites.
Note that he 11’s margin had grown back a little and at this review appointment we decided to do a little crown lengthening. This was done flapless with the waterlase.
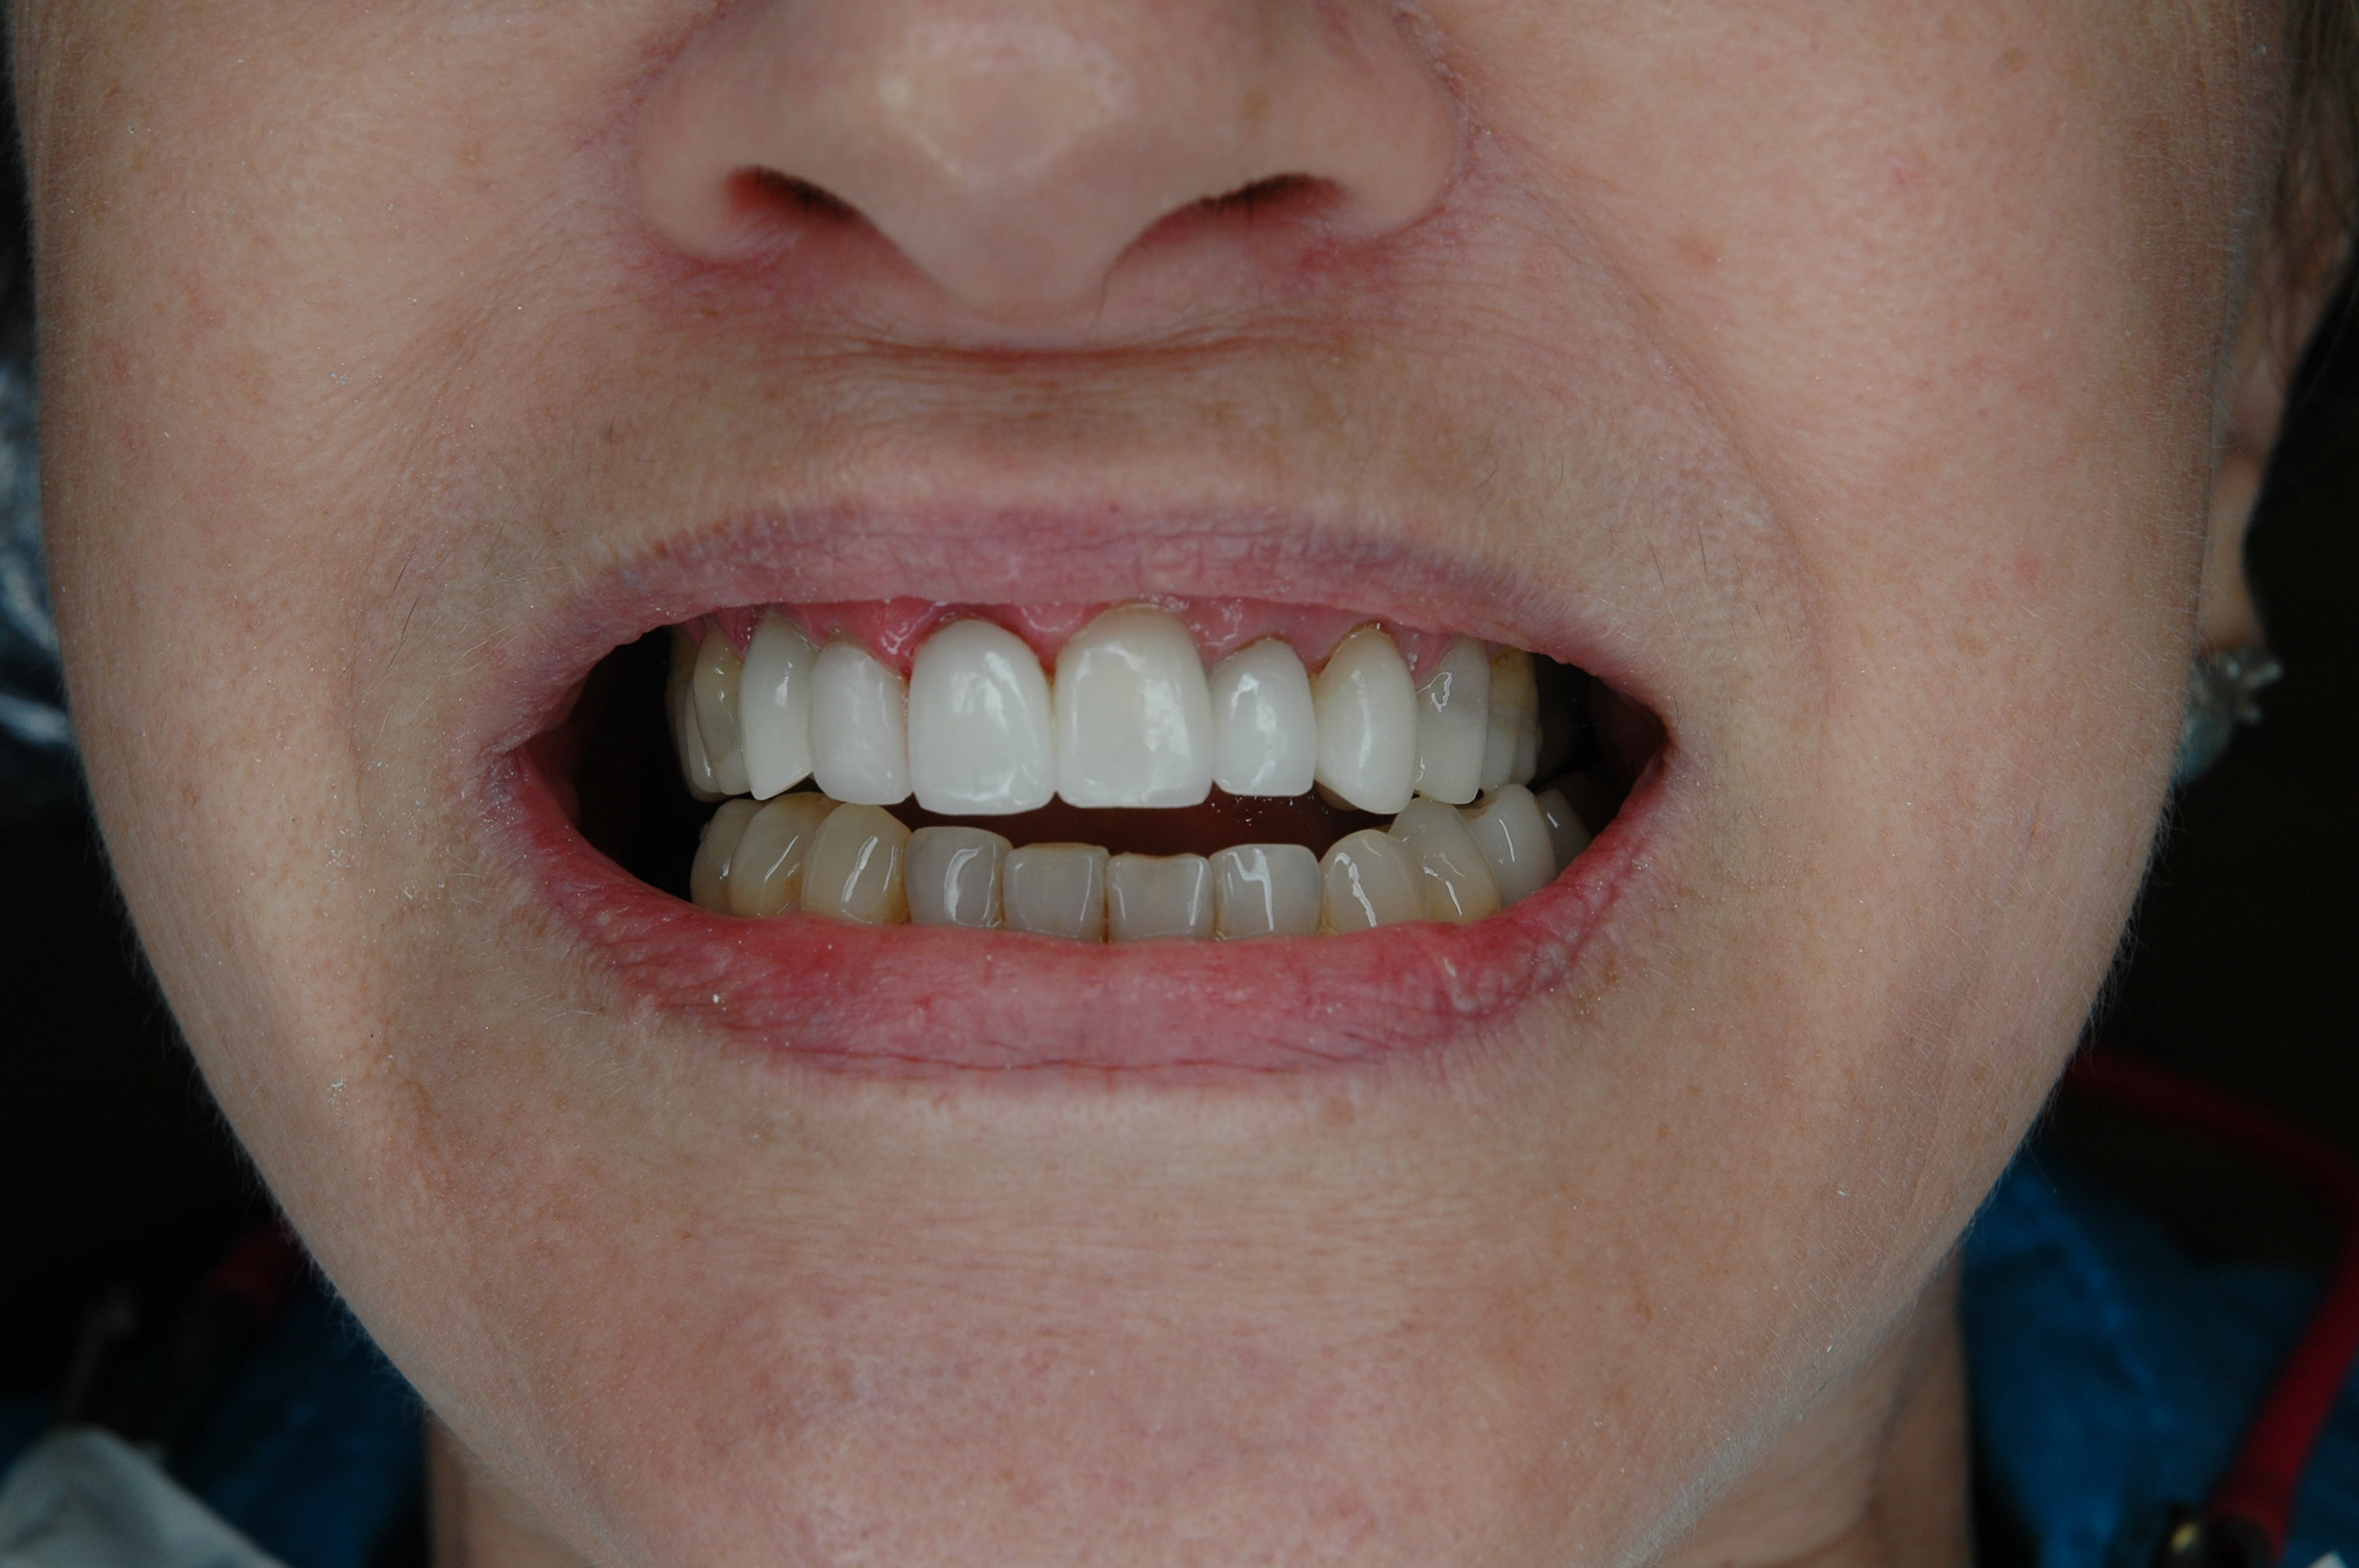
Stage 2
– Anterior CAD Ceramic restorations
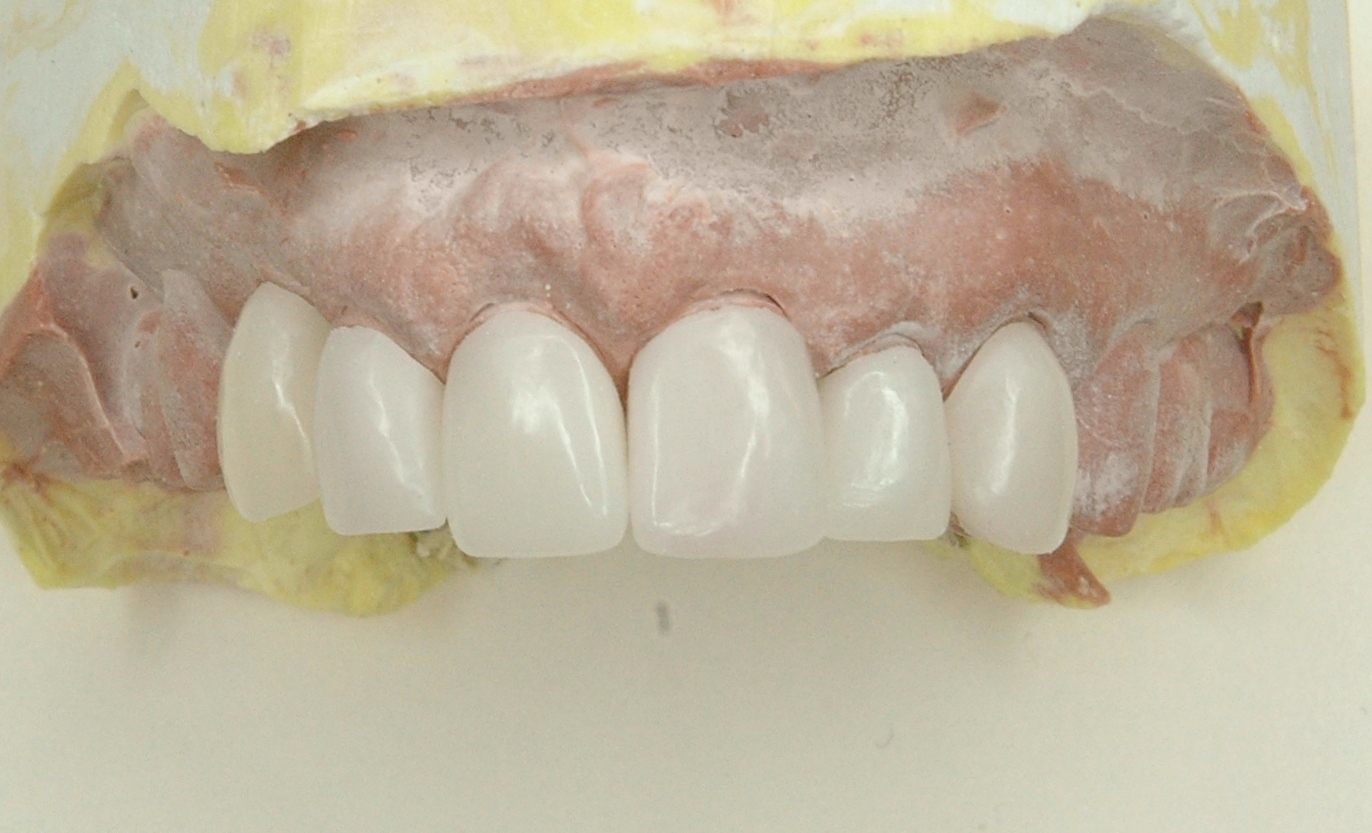
Normally we deliver these types of restorations in the same sitting. However since we did the crown lengthening procedure as well as the crown preparations I placed temporary crowns in position and delivered the final ceramic CAD restorations about a month later.
Cad Restorations in place

Leave a comment